How to Prepare for Ant Keeping – Beginner Ant Farm Guide

The colony is two weeks from your door. This is the most important two weeks of your first year, and it has nothing to do with the ants.
What kills new colonies is not what happens after they arrive. It is what hasn’t been prepared by the time they arrive. Wrong room, wrong location in the room, wrong substrate, wrong humidity in the formicarium. Once the ants are in, fixing any of that requires a stressful move. So we do all of it now, before the courier knocks.
Here is the order we recommend, broken into two weekends of small purchases and one evening of setup.
Weekend 1, Choose where the colony will live
Before anything else, walk around your apartment with this list and identify the spot.
☐ Stable temperature. Pick a room that stays between 18 and 26°C day and night. Avoid kitchens (heat swings), bathrooms (humidity swings), and any wall that shares with a heater or a window in direct sun.
☐ No direct sunlight on the formicarium. Sun through glass behaves like a magnifying lens. Two hours of afternoon sun can cook a colony in a single day.
☐ Away from sources of vibration. Speakers, washing machines, drum kits, fish tank pumps. Ants read vibration as predator activity and stop laying.
☐ Not on the floor where a vacuum runs. Sounds obvious, gets forgotten constantly.
☐ Stable surface, not a wobbling shelf. The arena should not move when you walk past.
☐ Within reach for feeding and observation. Top of a high cupboard means you will skip checks. Choose somewhere convenient.
The right answer is usually a low bookshelf or a side table against an interior wall, away from windows and heat sources. Mark the spot.

Weekend 2, Order the equipment
This is the core list. Order it all at once so it arrives before the colony does.
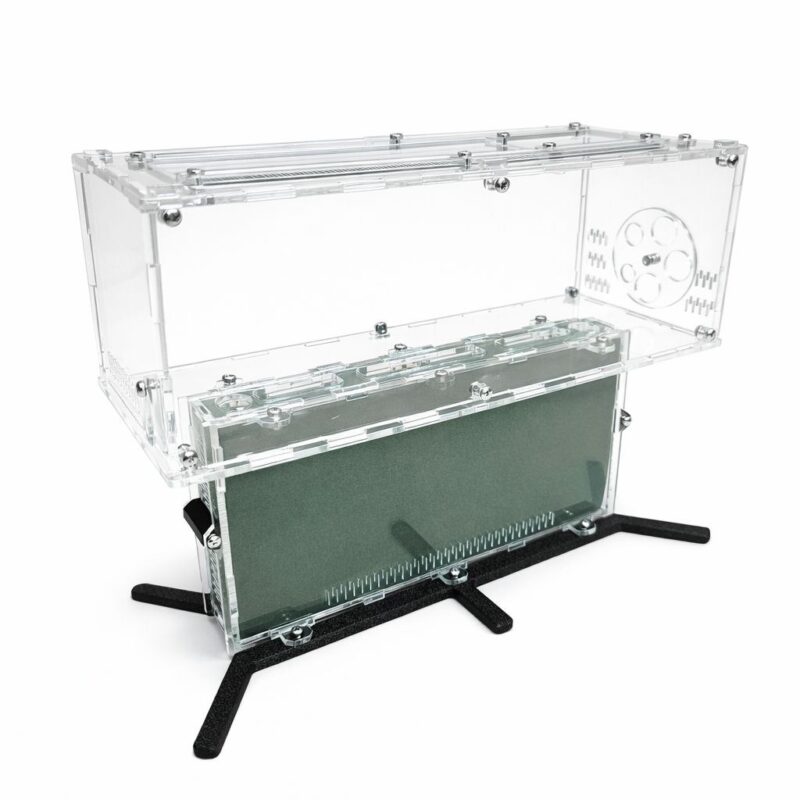
☐ Formicarium, sized for a small founding colony, not a future one. A nest of 4×6 cm is enough for the first year of most species. Browse formicaria by material and size.
☐ Outworld / arena, where they forage and where you place food. Built into many formicaria. If yours is separate, choose one with smooth vertical walls (escape-proof) and a tight-fitting lid.
☐ Sand or substrate for the arena, a thin layer of fine sand prevents ants from slipping and gives them places to deposit waste. Pick a sand.
☐ Decorations, small stones, bark, dried moss. Optional aesthetically but useful: they give ants hiding spots and reduce stress. See arena decorations.
☐ Hygrometer + thermometer, a single digital unit with both works fine. You need to see the humidity, not guess. Target 50-70% in the arena, 70-85% inside the nest depending on species.
☐ A small syringe or dropper, for adding water to the nest’s humidity chamber without flooding it.
☐ Feeding dish or flat stone, somewhere clean to place food. A bottle cap works. We prefer small ceramic dishes because they wash easily.
☐ Talc powder or PTFE liquid, escape prevention for the arena rim. A 1-cm band on the inside of the rim, kept dry, stops 95% of climbing escape attempts.
☐ Tweezers, soft brush, for moving food in and dead ants out. Cheap.
Total cost for the first kit is usually €40-80 depending on formicarium choice. The colony itself is separate.
Setup evening, assemble before the courier arrives
Block 90 minutes the day before the colony is scheduled to arrive. Have the room ready.
Step 1. Wash everything that will touch the ants in plain warm water. No soap residue, no detergent. Dry fully.
Step 2. Place the formicarium in its chosen spot. Once you put it down, you will not move it again for months, be sure.
Step 3. Add the substrate to the arena. A 5-mm even layer is enough. Smooth it out.
Step 4. Hydrate the nest. Most modern formicaria have a small water tank or wettable substrate. Add water with a syringe to the indicated point and wait an hour for it to absorb. The walls of the nest chambers should look slightly darker, humid, but not visibly wet.
☐ Step 5. Place decorations and feeding dish in the arena. Leave 2/3 of the arena floor open, ants need foraging space.
☐ Step 6. Apply the talc or PTFE barrier on the inside rim of the arena. Test it works, flick a small piece of paper at the rim and confirm it does not stick.
☐ Step 7. Position the hygrometer where you can read it from outside. Leave the setup for 24 hours before introducing the colony. Watch the readings stabilise. Adjust water if needed.
When the colony arrives, you should not be improvising. You should be moving them from the shipping container into a setup that has already been running, humid, dark and warm, for a full day.
Once the ants are in, do not feed for the first 48 hours. Do not check on the nest. Do not open the formicarium. The next two weeks belong to them.
The next part, the first 30 days of routine, covers what to expect once they settle in.
Did you like this article?
Thanks for your feedback!